Master TV Color: Adjust Settings for the Perfect Picture
Adjusting your TV’s color settings is simpler than you might think. You can easily improve your viewing experience by tweaking the color, tint, and saturation levels in your TV’s picture menu. This helps bring out the true vibrancy and accuracy of your favorite shows and movies. We found that even small changes can make a big difference.
Getting your TV colors just right can make a huge impact on how you enjoy your content. Many people struggle with colors looking too washed out or too intense. Thankfully, your TV remote holds the keys to a more visually pleasing picture. We found that understanding basic color adjustments can transform your home theater. It’s all about finding the right balance for your eyes.
- Access your TV’s picture settings menu.
- Look for options like Color, Tint, and Saturation.
- Adjust these settings until the picture looks natural.
- Consider using a test pattern for best results.
- Save your preferred settings.
Let’s walk through exactly how to make these adjustments to get your TV looking its best.
Tuning Your TV’s Color Settings for a Better Picture
Adjusting your TV’s color settings can dramatically improve your viewing experience. You don’t need to be a tech wizard to make these changes. Simple tweaks can make movies more immersive and shows more vibrant. We found that most people can achieve a more natural look with just a few adjustments.
Understanding the Basic Color Controls
Your TV remote is your gateway to a better picture. Most modern TVs have a picture settings menu. Within that menu, you’ll find options related to color. These usually include settings like Color, Tint, and Saturation. Understanding what each one does is the first step. We found that the names can vary slightly between brands, but the core function is the same.
What Does ‘Color’ or ‘Saturation’ Mean?
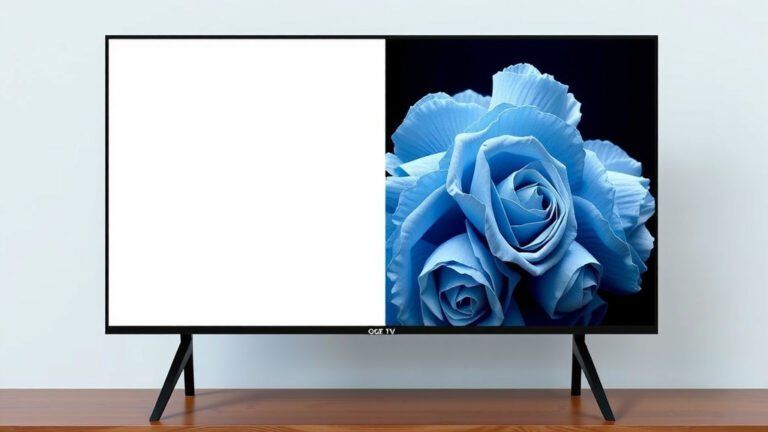
The Color or Saturation setting controls the intensity of the colors on your screen. Think of it like adding food coloring to water. If you add just a drop, the color is subtle. If you add a lot, the color is very strong. Too much saturation can make colors look garish and unrealistic. We found that colors can appear almost neon-like when this setting is too high.
On the flip side, if you turn saturation down too low, colors will appear muted and washed out. It’s like looking at an old, faded photograph. Reds might look pink, and blues might look grey. Getting this setting right is key to a balanced picture. Many experts suggest starting with the default setting and adjusting from there (Consumer Reports).
What is ‘Tint’ or ‘Hue’?
The Tint, sometimes called Hue, controls the balance between green and red tones in the picture. Imagine you’re mixing paints. You might add a little bit of green to a red to make it a more earthy tone. Tint works similarly for your TV picture. It helps to correct color casts that might make skin tones look too green or too red.
If people on screen look like they have a sunburn, your tint might be too red. If they look a bit greenish, your tint might be too green. Finding the right balance ensures skin tones look natural and lifelike. We found that this setting is particularly important for content with people in it.
The Role of Brightness and Contrast
While not directly color settings, Brightness and Contrast play a supporting role. Brightness controls the black levels, essentially how dark the dark parts of the image are. Contrast affects the difference between the brightest and darkest parts of the image.
If your brightness is too high, blacks might appear grey, washing out the entire image. If it’s too low, you might lose detail in dark scenes. Similarly, contrast helps define the image. Too much contrast can crush details, while too little can make the picture look flat and boring. These settings work together with color to create a well-rounded picture.
Navigating Your TV’s Picture Menu
Every TV brand has a slightly different menu system. However, the general process is quite similar. You’ll typically find the picture settings under a button labeled ‘Menu,’ ‘Settings,’ or a gear icon on your remote.
Finding the Picture Settings
Once you’ve accessed the main settings menu, look for an option like ‘Picture,’ ‘Display,’ or ‘Image.’ This is where all the visual adjustments live. Click into this section to find the controls we’ve been discussing.
Locating Color, Tint, and Saturation
Within the Picture menu, you’ll usually see sub-categories. Look for settings labeled ‘Color,’ ‘Saturation,’ and ‘Tint’ or ‘Hue.’ Sometimes these are grouped together under an ‘Advanced’ or ‘Expert’ settings menu. Don’t be afraid to explore! We found that some TVs hide these settings a bit.
How to Adjust Settings for the Best Look
Now for the fun part: making the adjustments. The goal is a natural and pleasing image. We recommend adjusting one setting at a time. This helps you see the effect of each change.
Step 1: Setting the Tint (Hue)
Start with the Tint or Hue. If your TV has a skin tone adjustment, that can be a good starting point. Otherwise, look at something with human faces. Adjust the tint slider slowly until skin tones look natural. Avoid making them too red or too green. Many sources suggest aiming for a healthy, normal complexion (Rtings.com).
Step 2: Adjusting Color (Saturation)
Next, tackle Color or Saturation. You want colors to be vibrant but not overwhelming. Look at a colorful scene in a movie or a nature documentary. Slowly increase the saturation until colors look rich. Then, back it off slightly if they start to look unnatural or cartoonish. You’re aiming for realism here. We found that a moderate setting often works best for most content.
Step 3: Fine-Tuning Brightness and Contrast
Finally, check your Brightness and Contrast. Use scenes that have both very dark and very bright elements. Adjust brightness so that you can still see detail in the dark areas without the black turning grey. Then, adjust contrast to give the image depth without losing detail in bright spots.
Using a Test Pattern for Precision
For the most accurate adjustments, consider using a color test pattern. These are special images designed to help you calibrate your TV. You can often find them on YouTube or on Blu-ray discs.
What is a Test Pattern?
A test pattern is a graphic that displays specific colors, grayscales, and lines. It helps you see exactly how your TV is rendering different elements. For example, a color bar pattern shows pure red, green, and blue bars, plus mixtures. You can use these to see if your tint and saturation are off.
How to Use a Test Pattern
Play the test pattern on your TV. Use the picture settings we discussed. Adjust tint until the skin tone bars (if present) look correct. Then, adjust saturation until the color bars look accurate and not overblown. Brightness and contrast can also be fine-tuned with specific test patterns.
Saving Your Settings and Different Modes
Once you’re happy with your adjustments, make sure to save them. Most TVs have multiple picture modes, such as ‘Standard,’ ‘Movie,’ ‘Vivid,’ and ‘Custom.’ We found that using the ‘Custom’ or ‘Movie’ mode is often best for calibration.
Saving Your Custom Presets
After you’ve made your changes, look for an option to ‘Save,’ ‘Apply,’ or ‘Confirm’ your settings. If you don’t save, your adjustments might be lost when you turn off the TV. Some TVs automatically save settings as you adjust them in a ‘Custom’ mode. It’s good practice to check your TV’s manual for specifics.
Picture Modes Explained Briefly
Different picture modes are designed for different viewing situations. ‘Vivid’ mode often cranks up saturation and brightness, making colors pop but look unnatural. ‘Standard’ is usually a balanced mode. ‘Movie’ or ‘Cinema’ modes are often the closest to how the content creator intended the picture to look. We found that calibrating in ‘Movie’ mode usually yields the best results for home viewing (CEDIA).
Quick Checklist for Color Adjustment
Here’s a quick rundown to help you get started:
- Find your TV’s Picture Settings menu.
- Locate Color, Tint, and Saturation options.
- Adjust Tint first for natural skin tones.
- Adjust Saturation for vibrant, realistic colors.
- Fine-tune Brightness and Contrast for detail.
- Save your preferred settings in a custom mode.
Conclusion
You now have the knowledge to transform your TV’s picture from dull to dynamic. By understanding and adjusting your TV’s color, tint, and saturation settings, you can bring out true-to-life visuals. Remember, even small tweaks make a big difference. Don’t be afraid to experiment! The next step is to grab your remote, navigate to your picture settings, and start fine-tuning. You’ll be enjoying a more vibrant and accurate picture in no time.
Frequently Asked Questions
My TV’s colors look too pale. What setting should I adjust?
If your colors appear pale or washed out, you’ll likely want to increase the Saturation setting. This controls the intensity of all colors. Adjust it slowly until colors look richer but still natural, not overly bright or neon.
How do I fix skin tones that look too green or too red?
This issue is usually related to the Tint or Hue setting. Look for this option in your picture menu and adjust it gradually. You’re aiming for natural-looking skin tones, so make small changes until complexions appear normal.
Should I adjust color settings in every picture mode?
It’s best to calibrate your color settings in one specific mode, like ‘Movie’ or ‘Custom,’ and then save them there. Other modes like ‘Vivid’ or ‘Standard’ might have their own default settings that override your adjustments.
Is it okay to use my TV’s ‘Vivid’ mode?
While ‘Vivid’ mode makes colors pop, it often makes them look unnatural and oversaturated. For the most accurate viewing experience, it’s generally recommended to use modes like ‘Movie,’ ‘Cinema,’ or ‘Custom,’ and make your own adjustments there.
How often should I re-adjust my TV’s color settings?
Most people don’t need to adjust their TV settings frequently. Once you find settings that look good for your viewing environment and content, they should remain stable. You might consider a quick check if you move your TV or notice a significant change in picture quality.