Understanding TV Hue Settings: A Simple Guide

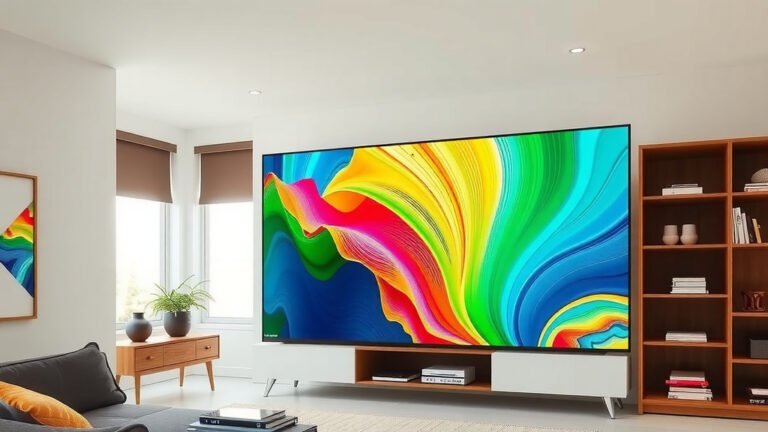
The TV hue setting controls the amount of red and green in your picture. It’s basically a slider that shifts colors on a spectrum. You’ll often find it near other color controls like saturation and tint. Getting this just right makes your TV look more natural.
Think of hue as the specific shade of a color. Is the grass on your TV a little too yellow-green, or a bit too blue-green? The hue setting helps you fine-tune that. Many experts suggest starting with the default setting and only adjusting if colors look obviously off. It’s one piece of the puzzle for a perfect picture.
- Hue adjusts the shade of colors on your TV.
- It balances red and green tones.
- Most people use the default setting.
- Only adjust if colors look unnatural.
Let’s walk through what each TV color setting does, starting with hue. We’ll cover how to adjust it for the best viewing experience.
You’ve got the basics of hue down thanks to that introduction! Now, let’s dig a little deeper. Understanding the hue setting is like getting the right paint color for your wall. You want it to look natural, right? Too much of one shade, and it just looks *off*. Your TV’s hue control helps you achieve that perfect balance.
Fine-Tuning Your TV’s Color Spectrum
The hue setting, often called “Color Tone” or “Tint” on some TVs, is all about the specific shade of your colors. Think of it as a color wheel. Hue lets you slide between different versions of a color. Is the green in a nature documentary looking a bit too yellow? Or perhaps the red in a sports jersey seems a bit too orange? Hue is your tool to fix that.
Understanding the Red-Green Balance
Most often, the hue slider on your TV is set up to balance red and green tones. When you move the slider one way, you might see more red pushed into the colors. Move it the other way, and you’ll likely see more green appear. This is because red and green are opposite each other on the color wheel. Most people find the default setting looks best.
Why default? Because TV manufacturers spend a lot of time calibrating their sets. They aim for a standard that looks good in most environments. Unless you notice a glaring issue, sticking with the default is often the smartest move. It’s like using a recipe as written before you start adding your own spices. Many experts recommend this approach.
When to Actually Adjust Hue
So, when *should* you touch that hue setting? The primary reason is if colors appear unnaturally vibrant or muted. Do people’s skin tones look flushed and overly red? Or maybe they look a bit too sickly green? That’s a sign your hue might need a tweak. It’s usually not a subtle adjustment; you’ll likely see a noticeable difference with even small changes.
Another situation is if you’re watching content that’s known for specific color palettes. Think of old Technicolor movies. They often had a very distinct look. If you’re trying to replicate that vintage feel, hue might play a small role. But for everyday viewing, your goal is natural, not stylized, colors.
Hue vs. Saturation: What’s the Difference?
It’s easy to confuse hue with saturation, but they do different jobs. Think of saturation as the intensity of a color. Is the color bold and bright, or faded and pale? Saturation controls that. Hue controls the actual shade, like we’ve been discussing.
Let’s use an analogy. Imagine you’re painting a picture of a blue sky. Saturation would be how much blue paint you’re using. Full saturation means a deep, rich blue. Low saturation means a pale, almost gray-blue. Hue, on the other hand, would be if you’re using a sky blue, a teal-blue, or a purple-blue. They work together to create the final look.
| Setting | What It Does | Analogy |
|---|---|---|
| Hue | Adjusts the specific shade of a color (e.g., red vs. green tint). | Changing from sky blue to teal blue. |
| Saturation | Controls the intensity or purity of a color (e.g., bright vs. faded). | Making a blue color richer or paler. |
| Brightness | Controls the overall lightness or darkness of the picture. | Dimming or brightening the entire image. |
| Contrast | Adjusts the difference between the lightest and darkest areas. | Making whites brighter and blacks deeper. |
How to Access and Adjust Hue
Finding the hue setting is usually straightforward. You’ll typically find it within your TV’s picture settings menu. Navigate to ‘Picture,’ then look for ‘Advanced Settings’ or ‘Color Settings.’ You should see options like ‘Hue,’ ‘Tint,’ ‘Color Tone,’ or sometimes ‘RGB Gain/Offset’ if you get really technical.
Once you locate it, you’ll usually see a slider with numerical values. These can vary between TVs. Some might go from -10 to +10, while others might use a 0-100 scale. Remember, the goal is natural-looking colors. You’ll want to use a reference image or video that has familiar colors. A nature documentary or a show with well-lit faces is perfect.
Using a Reference Image or Video
The best way to see if your hue is right is to use something you know well. Many TVs come with built-in test patterns. If yours doesn’t, you can find color calibration videos on YouTube. Look for ones that focus on skin tones and natural landscapes. Watch a few minutes of familiar content after making an adjustment. Does it look better or worse?
Trust your eyes! If the colors look more realistic and less jarring, you’re probably heading in the right direction. Many sources, including imaging professionals, recommend making small, incremental adjustments. This helps you avoid overshooting the mark and making the colors look unnatural again.
Common Hue Setting Pitfalls to Avoid
One of the biggest mistakes people make is over-adjusting. They see a slight difference and keep fiddling, only to end up with colors that look cartoony or washed out. Remember, a little goes a long way with the hue setting.
Another pitfall is adjusting in a poorly lit room. Ambient light can trick your eyes. What looks right in bright daylight might look very different in the evening. We found that it’s best to adjust your settings in the lighting conditions you typically watch TV in. This ensures accuracy. The same goes for adjusting saturation or brightness without considering hue.
The Role of Other Picture Settings
Hue doesn’t exist in a vacuum. It interacts with other settings like saturation, brightness, and contrast. If you’ve heavily adjusted your saturation, for example, you might need to re-evaluate your hue. A very saturated red might start to look a bit too orange, prompting a hue adjustment.
Many picture experts suggest starting with basic calibration first. Get your brightness and contrast set correctly. Then, tackle saturation. Finally, use hue to fine-tune the shades. This systematic approach helps ensure all your settings work together harmoniously. You don’t want to chase one setting down a rabbit hole, only to mess up another. Our guide on getting the best picture explains how to use hue to fine-tune the shades.
When Experts Recommend Adjusting Hue
Research indicates that for most modern TVs, the factory default hue setting is quite accurate (PCMag). However, if you’re using a TV in a very specific environment or have particular viewing preferences, adjustments can be beneficial. For example, some enthusiasts recommend a slight shift towards green for certain types of content to achieve a more cinematic look.
But for the average viewer, the default setting is a safe bet. Unless you notice obvious color problems, like unnatural skin tones or bizarrely tinted objects, you can likely skip this adjustment. Many sources suggest that if you don’t know what you’re looking for, it’s better not to touch it. Your goal is a natural picture.
- Confirm your TV’s default hue setting.
- Use a familiar image or video for reference.
- Make small, gradual adjustments.
- Watch for natural skin tones and colors.
- Adjust in your typical viewing environment.
- Don’t over-adjust; less is often more.
Conclusion
You’ve learned that your TV’s hue setting is your secret weapon for natural-looking colors. It’s all about balancing those reds and greens to get the perfect shade. While most modern TVs are well-calibrated at the factory, knowing how to tweak hue can fix those odd color casts. Remember to start with the default and only adjust if something truly looks off, especially with skin tones or natural scenes. Your goal is always a realistic picture.
So, take a moment to check your TV’s color settings. If you see an unnatural tint, make small adjustments using a familiar image or video. You’ll be enjoying a more lifelike viewing experience in no time!
Frequently Asked Questions
Does every TV have a hue setting?
Most modern TVs include a hue or tint setting in their advanced picture options. Some budget models or very basic displays might omit this advanced control. You’ll typically find it under the “Picture” or “Color Settings” menu.
Should I adjust the hue for all content?
Generally, no. You only need to adjust hue if you notice a consistent, unnatural color cast across different types of content. For most viewers, the default factory setting provides accurate colors for everyday viewing.
How can I tell if my TV’s hue is set correctly?
Look for natural skin tones on people in shows or movies. Also, check landscapes; grass should look green, not yellowish or bluish. If colors appear vibrant and lifelike without being jarring, your hue is likely set correctly.
What’s the difference between hue and color temperature?
Hue adjusts the balance between red and green tones within a specific color. Color temperature, on the other hand, affects the overall warmth or coolness of the entire picture, often by adjusting the blue and red levels for white points.
Can adjusting hue improve picture quality significantly?
Adjusting hue can make a noticeable difference if your colors are off. It helps achieve a more natural and realistic image by fine-tuning color shades. However, it won’t dramatically improve sharpness or contrast, which are controlled by other settings.